10 thg 6, 2011

Mùa Tôm

Đêm khuya lặng lẽ
Mưa rơi khe khẽ
Tay cầm chuột...
Ta vẽ ...
Những đường kẽ ...
.........Xong hình cần vẽ
Bỗng ...
Chấm sáng... đốm sáng...
Nghĩ đến ma...
sờ sợ. tắt máy đi ngủ. hết ngày cũ....

24 thg 5, 2011

Source Code Game Sudoku Android

Đây là toàn bộ source code game Sudoku. Các bạn download về kham khảo vào phát triển thêm.
Link download : Tại Đây

19 thg 5, 2011

Tao Alert Dialog with OK and Cancel options Trong Android


Alert Dialog with OK and Cancel options

 AlertDialog.Builder myAlertDialog = new AlertDialog.Builder(AndroidAlertDialog.this);
 myAlertDialog.setTitle("--- Title ---");
 myAlertDialog.setMessage("Alert Dialog Message");
 myAlertDialog.setPositiveButton("OK", new DialogInterface.OnClickListener() {

  public void onClick(DialogInterface arg0, int arg1) {
  // do something when the OK button is clicked
  }});
 myAlertDialog.setNegativeButton("Cancel", new DialogInterface.OnClickListener() {
       
  public void onClick(DialogInterface arg0, int arg1) {
  // do something when the Cancel button is clicked
  }});
 myAlertDialog.show();
(Suu tam). 

Doc Doan Text trong EditText

Khi ban nhap vao button Play Random Tetx . Chuong trinh se doc doan van ban cua ban voi ngon ngu ma ban chon san. O day minh chon ngon ngu la English.
Do dung ubuntu chua co unikey nen viet khong dau. Mong cac ban thong cam.
Hinh cua chuong trinh :

15 thg 5, 2011

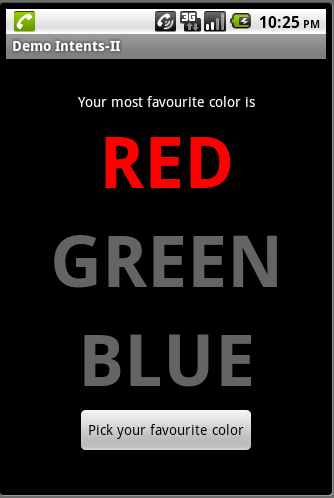
Intent II

Intent II 

Step 1 : 
 
Step 2 :

Step 3 :


Code :

Intent I

Demo Intent I


res/layout/main.xml

<?xml version="1.0" encoding="utf-8"?>
<LinearLayout xmlns:android="http://schemas.android.com/apk/res/android"
    android:orientation="vertical"
    android:layout_width="fill_parent"
    android:layout_height="fill_parent"
    android:padding="8dp" >
    <Button
        android:id="@+id/buttonViewContacts"
        android:text="View Contacts"
        android:layout_width="fill_parent"
        android:layout_height="40px" >
    </Button>
    <Button
        android:id="@+id/buttonViewCallLog"
        android:text="View Call Log"
        android:layout_width="fill_parent"
        android:layout_height="40px" >
    </Button>
    <Button
        android:id="@+id/buttonViewGallery"
        android:text="View Gallery"
        android:layout_width="fill_parent"
        android:layout_height="40px" >
    </Button>
    <Button
        android:id="@+id/buttonViewPhone"
        android:text="View Phone Call"
        android:layout_width="fill_parent"
        android:layout_height="40px" >
    </Button>
</LinearLayout>

file Episode.java

package com.example.intends;


import android.app.Activity;
import android.content.Intent;
import android.os.Bundle;
import android.view.View;
import android.view.View.OnClickListener;
import android.widget.Button;

public class Intends extends Activity {
    /** Called when the activity is first created. */
    @Override
    public void onCreate(Bundle savedInstanceState) {
        super.onCreate(savedInstanceState);
        setContentView(R.layout.main);
      
        Button buttonContacts = (Button) findViewById(R.id.buttonViewContacts);
        buttonContacts.setOnClickListener(new OnClickListener() {
           
            public void onClick(View v) {
                // TODO Auto-generated method stub
               
                Intent i = new Intent();
                i.setAction(Intent.ACTION_VIEW);
                i.setData(android.provider.Contacts.People.CONTENT_URI);
                startActivity(i);
            }
        });
       
       
        Button buttonCallLog = (Button) findViewById(R.id.buttonViewCallLog);
        buttonCallLog.setOnClickListener(new OnClickListener() {
           
            public void onClick(View v) {
                // TODO Auto-generated method stub
               
                Intent i = new Intent();
                i.setAction(Intent.ACTION_CALL_BUTTON);
                startActivity(i);
            }
        });
       
       
        Button buttonGallery = (Button) findViewById(R.id.buttonViewGallery);
        buttonGallery.setOnClickListener(new OnClickListener() {
           
            public void onClick(View v) {
                // TODO Auto-generated method stub
               
                Intent i = new Intent();
                i.setAction(Intent.ACTION_VIEW);
                i.setData(android.provider.MediaStore.Images.Media.INTERNAL_CONTENT_URI);
                startActivity(i);
            }
        });
       
        Button buttonPhone = (Button) findViewById(R.id.buttonViewPhone);
        buttonPhone.setOnClickListener(new OnClickListener() {
           
            public void onClick(View v) {
                // TODO Auto-generated method stub
               
                Intent i = new Intent();
                i.setAction(Intent.ACTION_DIAL);
                startActivity(i);
            }
        });
    }
}

14 thg 5, 2011

Game Sudoku (Android) -- Implementing an About Box

Mục đích của bài này là khi bạn nhấp vào Button About trong màn hình của bài trước. bạn sẽ show ra thông tin về cần thiết về game của bạn.
2 vấn đề chính :
    1. Định nghĩa 1 Activity mới và khởi động nó.
    2. Sử dụng lớp AlertDialog và hiển thị nó lên.
Thực hiện :

Bạn vào res/layout tạo 1 file xml About.xml như sau :

  1. <?xml version="1.0" encoding="utf-8"?>
    <ScrollView
        xmlns:android="http://schemas.android.com/apk/res/android"
        android:background="@color/backgound"
        android:layout_width="fill_parent"
        android:layout_height="fill_parent"
        android:padding="10dip" >
        <TextView
            android:id="@+id/about_content"
            android:layout_width="wrap_content"
            android:layout_height="wrap_content"
            android:text="@string/about_text" />
    </ScrollView>

Sau đó bạn vào file strings.xml thêm vào nội dung sau :

  1. <string name="about_title">About Android Sudoku</string>
        <string name="about_text">Sudoku dc phat trien boi Sungha-CN08A-GTVT</string>

Vậy là bạn đã tạo xong nội dung và layout cho About.
Bây giờ bạn vào tạo 1 class About.java bạn viết code như sau :

  1. package org.example.Sudoku;

    import android.app.Activity;

    import android.os.Bundle;

    public class About extends Activity{

        @Override
        protected void onCreate(Bundle savedInstanceState){
            super.onCreate(savedInstanceState);
            setContentView(R.layout.about);
        }
    }


 Trong class Sudoku.java bạn viết code như sau :

  1. package org.example.Sudoku;

    import android.app.Activity;

    import android.app.AlertDialog;
    import android.os.Bundle;
    import android.content.DialogInterface;
    import android.content.Intent;
    import android.util.Log;
    import android.view.View;
    import android.view.View.OnClickListener;
    import android.view.Menu;
    import android.view.MenuInflater;
    import android.view.MenuItem;
    public class Sudoku extends Activity implements OnClickListener {
        /** Called when the activity is first created. */
        private static final String TAG = "Sudoku" ;
        @Override
        public void onCreate(Bundle savedInstanceState) {
            super.onCreate(savedInstanceState);
            setContentView(R.layout.main);
           
            //Set up clicks listener all button
            View continueButton = findViewById(R.id.continue_button);
                 continueButton.setOnClickListener(this);
            View newButton = findViewById(R.id.new_button);
                 newButton.setOnClickListener(this);
            View aboutButton = findViewById(R.id.about_button);
                 aboutButton.setOnClickListener(this);
            View exitButton = findViewById(R.id.exit_button);
                 exitButton.setOnClickListener(this);
           }
      ///////////////////////////////////////
  1.   public void onClick(View v) {
               switch (v.getId()) {
               case R.id.about_button:
              Intent i = new Intent(this, About.class);
              startActivity(i);
              break;
                 // More buttons go here (if any) ...
    }
    }

 Trong AndroidManifest.xml bạn đăng kí bằng dòng lệnh sau :

  1. <activity android:name=".About"
               android:label="@string/about_title" >
    </activity>

Tạo Theme cho layout :

Vào trang AndroidManifest.xml them đoạn code sau :

  1. <activity android:name=".About"
              android:label="@string/about_title"
              android:theme="@android:style/Theme.Dialog" >
    </activity>


Làm đúng các bước trên các bạn có kết quả sau :

    Bản beta đầu tiên

    Sau 6 tháng cả team cặm cụi làm việc điên cuồng, bản alpha cũng được giới thiệu ra toàn bộ công ty và được testing nội bộ công ty mà thôi. ...